Contact us & follow our progress...
Online shopping coming someday hopefully.


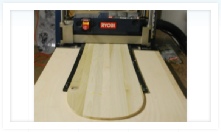
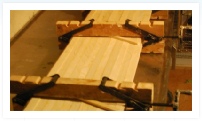
The core determines how and where the board will flex, the amount of rebound it will have and is the key factor in how responsive it will be so at Chair2, we take a lot of time in crafting our cores.
Each core starts by us hand selecting the wood from our local hardwood dealer and cutting it down to one inch by 10 mm strips that are glue lamed back together to form the block that we work into the core. Each block is passed through the planer to bring it down to the desired thickness (usually around 7mm) then placed on a jig and passed through the planer several more times to profile the tip and tail down to 2mm thick.
But we’re not done yet; this is where most core makers stop but we hand plane the tip and tail of each core until we get the flex that we want for the particular design and specs we are working on. This allows us to make custom cores that give a unique riding experience on each board that comes out of the shop.
Our standard cores are made from poplar with ash stringers but we have are working with other harder woods on the outer strips that double as sidewalls on the side to side/tip to tail core designs where we want wood sidewalls all the way around the board.
A good quality core is the foundation to the deck, no reason to cut corners here.
Its all about the cores!
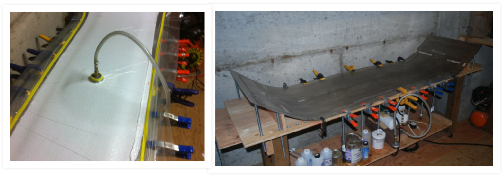
We currently use an adjustable vacuum press to cook our boards. The vacuum press doesn’t give us quite as much pressure as a typical I-beam press but gives us great flexibility in changing up the flex and camber profiles. We can adjust the press quickly to make different sizes or set the camber from standard to rocker and everything in between. We add a little heat to cook the deck for the first few hours after it goes in and leave the it in the press, under vacuum, for 48 hours followed by another 48 hours of cure time in a warm room before the board is ever cut or bent to ensure we get a good bond throughout the deck.
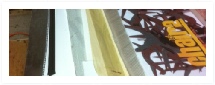
Fiberglass and stuff
We use Durasurf base material from Crown Plastic for each board and wrap it with sandblasted edges from CDW. All the plastics put into our boards are flamed just before layup to ensure maximum bonding with the epoxy.
Vacuum pressing the decks...
Graphics
Each board is sandwiched with different weights of fiberglass to accent the flex characteristics we are looking for. For example, our basic glass layup on the All Mountain is a 20oz trixal on the bottom with a 17oz biaxial on the top and a single one inch wide strip of carbon fiber from tip to tail to give it some kickback. We change up the sandwich blend of the glass to match the flex and rebound effects we are looking for on each board.
We also install VDS dampening tape on top of the edges all the way around each board we make to help bond the edges to the glass and provide and makes them a bit more responsive when your cranking on an edge.
Paper, nylon, PBT? All depends what you want. Paper graphics embedded in epoxy and protected with thin 6oz e-glass is our preferred method for demo boards because its cheap and easy to change but once we decide on a graphic, we can order out with a local supplier to get our custom graphics printed either on nylon or PBT for a professional look and feel.